 |
| V360 Repair |
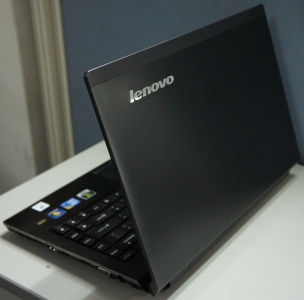
I have done the impossible! I manage to restore my Lenovo V360 despite the changes on the partition size.
I have posted in the Lenovo forum begging for a method of activating back my factory restoration but always given the cold shivers. So in this post, I'm goin share my knowledge of RESTORING YOUR V360 TO FACTORY CONDITION.
CONDITION: Factory Backup Disk was never found (assumed lost). Original partition was modified. Installed Ubuntu, and Windows 7 Ultimate. Sometimes later I decided to use my old Win 7 Premium Pre-installed when I purchase the laptop. Fortunately, the hidden partition named LENOVO_Backup was still there.
PROBLEM: OKR key is not working. Unable to boot into hidden partition.
SOLUTION: there are three main steps we need to take.
Step 1) Prepare a Windows PE (Pre-Environment) on a USB Flash Drive.
How this was done can be found in this link:
http://technet.microsoft.com/en-us/library/dd744530(WS.10).aspx. You will need to build a "Technician Computer" in the first place. Register with Microsoft to get your own copy of Windows OPK (Windows OEM Preinstalation Kit).
The Win OPK image will be 2GB large, so be prepared. Here is the link to make your life easier:
http://www.microsoft.com/oem/en/downloads/pages/windows_7_opk.aspx.
Once download complete, mount it on a virtual cd-rom drive. I used Virtual Clone Drive from SLYSOFT.COM (
http://www.slysoft.com/en/virtual-clonedrive.html) and install. Congratulations, you now have a technician computer.
To prepare the Windows PE on USB Flash Drive (UFD),
- On your technician computer, click Start, point to All Programs, point to Windows OPK or Windows AIK, right-click Deployment Tools Command Prompt, and then select Run as administrator.
- At the command prompt, run the Copype.cmd script. The script requires two arguments: hardware architecture and destination location.
copype.cmd x86 c:\winpe_x86
x86 is the processor architecture. depending on your porcessor type, choose either x86, amd64, or ia64.
- Copy the base image (Winpe.wim) into the \Winpe_x86\ISO\sources folder, and rename the file to Boot.wim.
copy c:\winpe_x86\winpe.wim c:\winpe_x86\ISO\sources\boot.wim
5. Prepare the UFD by formatting it. The easiest is by using the Windows formatting method. Click
Computer > Right click the USB drive >
Format. Change "file system" to FAT32. use quick format and click Start.
6. Back on the CMD, type;
xcopy C:\winpe_x86\iso\*.* /e F:\
This command will copy all files from WinPE ISO file we created in step 2. be sure to copy the files into the correct driveletter. In this case, the UFD is mounted at F.
Step 2) Preparing the HDD.
Caution; your hard disk will be wiped out. Backup your files somewhere else.
1) Boot into the UFD. Pressing F12 at the boot loader screen will provide this option. once booted, follow this method and proceed with caution. DO NOT MODIFY PARTITION CONTAINING YOUR FACTORY IMAGE (Normally labeled OEM, LENOVO_PART or LENOVO_FACTORY).
diskpart

list disk

select disk 0

list partition

select partition 1

delete partition

If you have more than 1 partition other than the factory image,

select partition 2

delete partition

Now, we create a new partition;

create partition primary

select partition 1

active

format

fs=ntfs label="Windows" quick

assign letter=c

Activate your factory image partition

select partition 3

active

set id=12

assign letter=m

you can type help to get the additional options.

exit to close disk part
without closing the cmd, we proceed to step 3.
Step 3) Copy the image files into main partition 'Windows'.
Now that the main partition is ready, we are going to copy all the files from the factory image into the main partition. To do this, we input this command;
xcopy M:\*.* /e C:\

Now sit back and go make yourself a cup of tea or visit my other blog; http://rabbitjunction.blogspot.com/. Do not disturb the system as it could take a while. When all file is copied, simply restart your system. it should boot straight into Lenovo OKR. Tell me if you have any problem. This method maybe can also apply on any Lenovo laptop.
Don't forget to repair the MBR. Just insert a windows 7 Installation CD and choose the repair option. Your PC will automatically attempt the repair.


